Ocumen Configuration - Overview
Table of Contents
Introduction
Each eye tracker needs to configured to the user’s eyes in order to get the most out of the eye tracker’s capabilities. The configuration of the eye tracker involves two key steps:
- A position guide which instructs the user to position their headset in a good spot to optimize visual clarity and eye tracking performance
- A calibration which tunes the eye tracker to the user’s eyes to optimize eye tracking performance
After these steps, two more optional steps are available:
- A post-calibration visualizer which acts as a ‘self-check’ of eye tracking quality
- A calibration quality visualizer which gives numerical feedback on the quality of the calibration
To fit the wide variety of VR eye tracking use cases, Tobii Ocumen provides Unity scripts and prefabs to help you customize the configuration flow to your needs. This allows you to prioritize the calibration quality, the user experience, or both. The following are some aspects that you may want to customize:
- The number of calibration points
- Calibration point locations
- Graphics, animations, and sound
- User instructions
In addition, the configuration prefabs allow you to embed the configuration flow into your own app. This greatly improves the user experience by avoiding the need to switch between apps.
Configuration Steps
The following are the steps to configure your eye tracker.
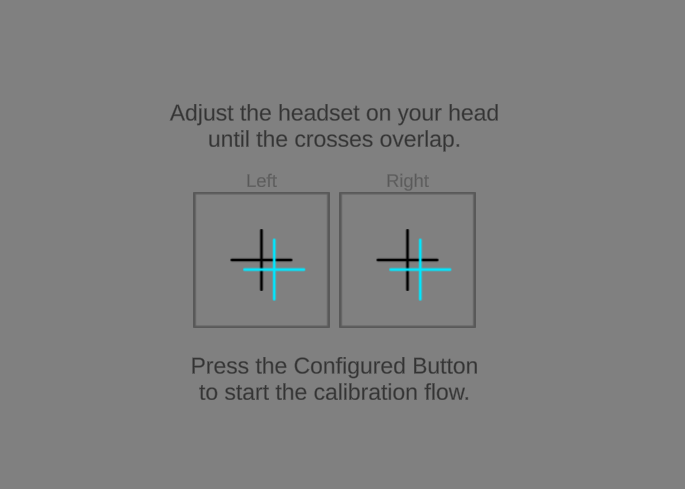
Step 1: Position Guide

When a user puts on a headset, the placement of the headset can greatly affect the visual clarity of the rendered content as well as the quality of the eye tracking. The goal is to position the headset so that the user gets as good VR experience as possible, and the eye tracker can measure the user position in headset and the user can be guided to an optimal placement. The position guide can also help the user to adjust headset lens separation (also known as interpupillary distance).
The position guide should be run immediately before the calibration.
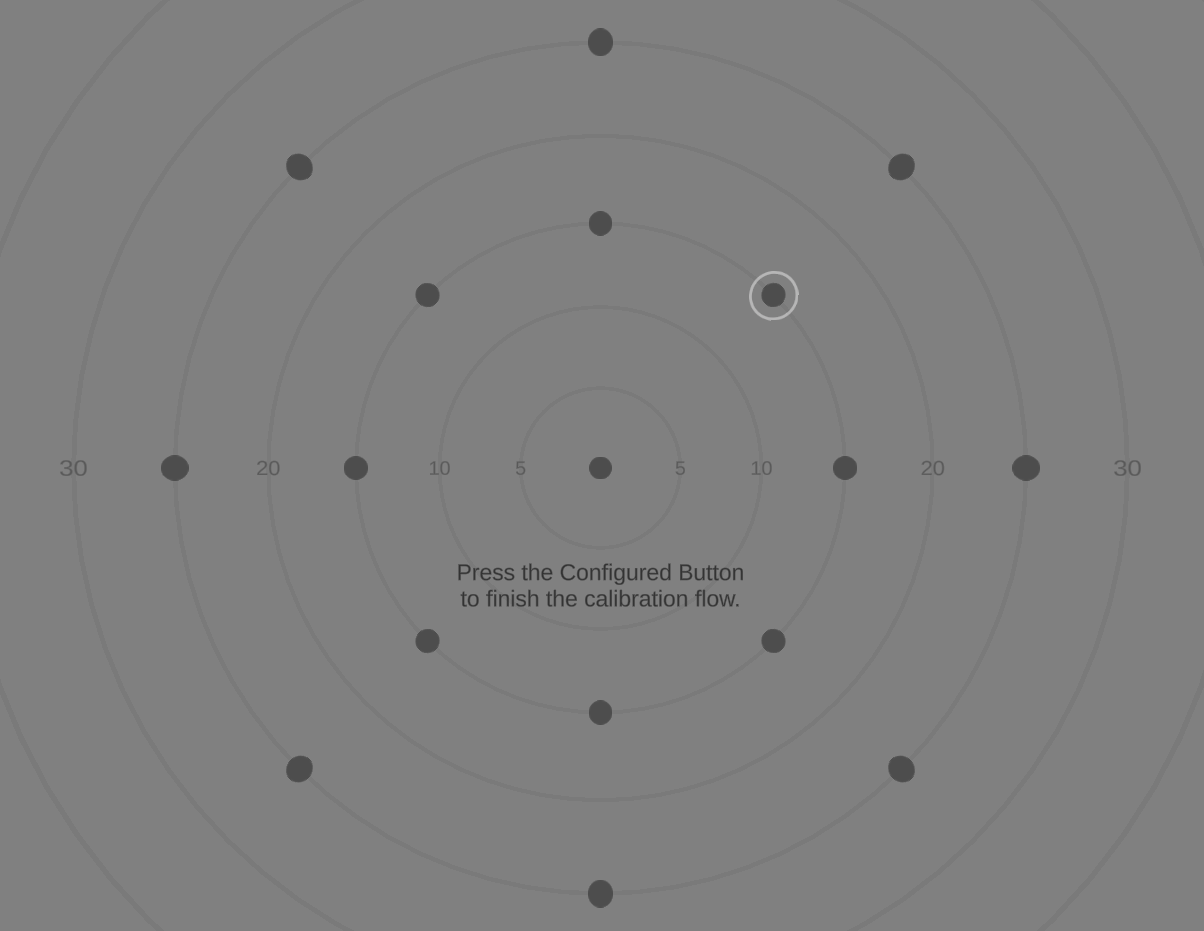
Step 2: Calibration

Personal calibration is the optimization of the Tobii eye models for the specific characteristics of the user’s eyes. The calibration is tuned specifically for the conditions that was used at the time of calibration.
During the personal calibration, the user is instructed to follow a single stimulus point that is moving across the screen. The stimulus point movement will be between defined positions on the screen and the eye tracker will collect gaze data to be used for a personalized calibration of the eye tracker algorithms. When designing your personal calibration sequence, the following aspects should be considered:
- Background color and brightness
- Design of stimulus point
- Placement of stimulus points
- Data collection
- Failure handling
Tobii Ocumen comes with a ‘Tobii User Calibration Guidelines’ document with best practices for these considerations.
Step 3 (optional): Post-Calibration Visualizer

Depending on the use case, a post-calibration gaze visualizer can be shown to enable users to self-check the quality of their newly-applied calibration before proceeding or re-calibrating. In this step, a graphical representation of the user’s gaze point is shown, as well as some other graphics to look at. The user can visually judge how well the gaze point aligns with they point on the screen they are looking at.
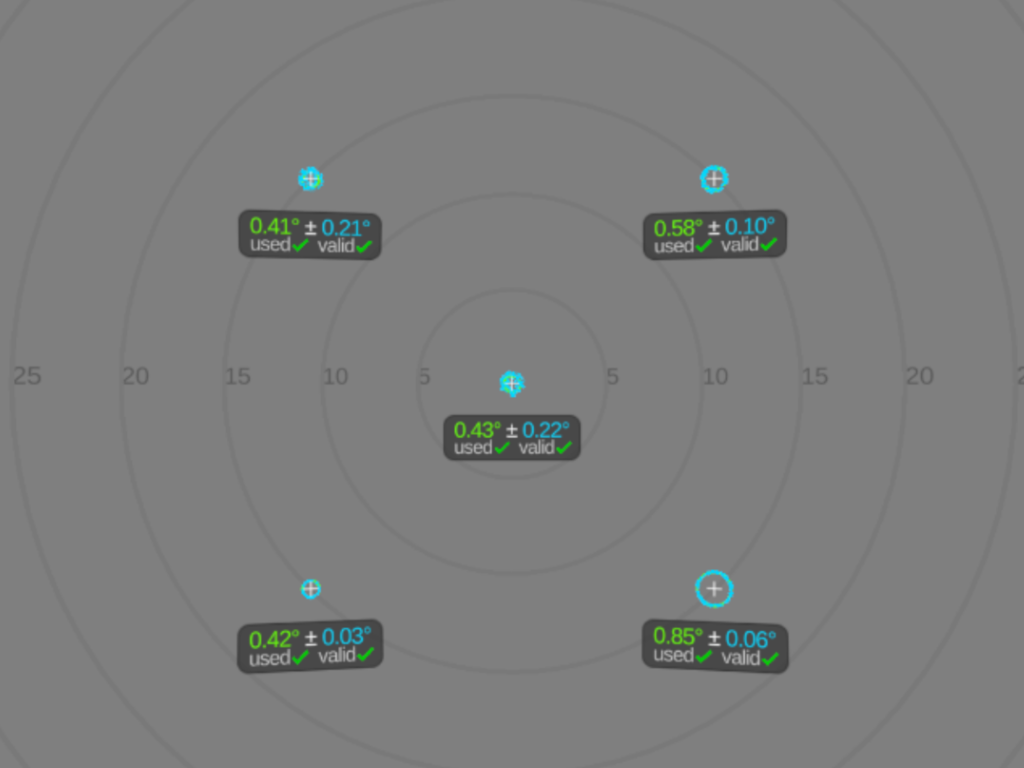
Step 4 (optional): Calibration Quality Visualizer

For a more rigorous determination of eye tracking quality, Tobii Ocumen provides some calibration quality metrics.
These metrics can be used to:
- Get an estimate of the expected gaze performance of the current user
- Determine if the user has significantly worse performance in certain angles
- Verify that the user looked at all the stimuli and valid data was collected
The calibration quality visualizer uses a small dataset that tells you the bias and precision of that user at the time when they calibrated. If you want to perform a more statistically viable calculation of bias and precision, we recommend that you perform your own data collection, see the Measure Quality Yourself section below.
Step 5 (bonus): Measure Quality Yourself

The API used to measure calibration quality is limited due to it being measured during a configuration (before the calibration was applied). You can make your own calculations after a configuration has been run to get more accurate data about the user’s current eye tracking quality.
For example, a person calibrates and then afterwards looks at another set of points in the same location. On the second time the user looks at the points, you can store all of the gaze points that correspond with each stimulus point. From the gaze points you can derive an exact bias, bias direction and precision, and also see outliers which may be of interest.
This can also be useful to run after a person has used the headset for a while, to compare quality before and after the person has completed a task. This approach requires the person to look at multiple sets of points, which may be tiring, but it may be worth the effort.
To get started with implementing this, the calibration process in the Unity Configuration Sample can be duplicated and modified to not actually calibrate, but instead collect the person’s gaze points at each stimulus point, and afterwards calculate bias and precision for each stimulus point.
